Thursday, September 30, 2010

Popsicle Clips

Aah - where does the time go? These last two weeks have been so BUSY I hardly have time to think! Plus I'm starting to come down with a cold, and I'm taking the LSAT next weekend...trying to figure out what I'm doing next year is so confusing! But anyway...

Today we have: Popsicle hair clips!


Adorable. And they're pretty simple to make - view the tutorial on Sew Hip Mama. Cute!

Saturday, September 25, 2010

Halloween Frame

It's almost October, and you know what that means...the best holiday of the year is almost here! Time for Halloween crafts! My mom actually did one of these first, after seeing one in one of the shops around here. So I did one too, but with candy! Starts off with a picture frame, a piece of scrapbook paper, a vintage Halloween card, some ribbon, and some 3D scrapbooking stickers and cutouts.

Arrange it all together and...

Ta-da! I love it. I'll probably outline the eyes with green glitter glue tomorrow. Hooray for October!

Tuesday, September 21, 2010

Gumball Flowers

What would we do without link parties? How would we ever find all the cool stuff out there? I don't know. And thankfully, I won't have to find out.

It was at just such a link party that I stumbled across Not Just a Mommy! I have to tell you, I love this site. Lots of party ideas, and party blogs do seem to be the latest "in" blog trend. Here's a tutorial on one of the crafts she did for a sweets party - I'm waiting for the tutorial on those tissue paper lollipops!

Sunday, September 19, 2010

Sushi Stitching

Alrighty, a super-quick post today - I'm about to leave to go apple picking! Yay! It's a fall tradition for my roommates and me, even though it's blisteringly hot this year. Today's craft is: sushi cross stitching!


I found this on Hancock's House of Happy. Not sure what I'd put this on, but it sure is cute!

Thursday, September 16, 2010

Sweets Applique Quilt - Ice Cream Cone

Alrighty, a nice, picture-heavy post today. So, if you remember, a while back I did a post about the applique quilt I started. Well, I've definitely made some headway, but school started and everything ground to a halt (homework, work, studying for the LSAT - there just aren't enough hours!) Anyway, I posted the cutout fabric for the cupcake. Well, I've gotten it stitched now. I had wanted to do it by machine, but I just couldn't get the details, so I ended up doing it all by hand (another reason why it's going so slowly). So here's the cupcake, all sewed up:


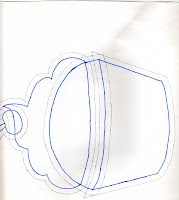
Also, I highlighted the lines on the pattern so they'll be easier to see (the pencil lines are a seam allowance, if you need one). Sorry it got cut off - the pattern is bigger than my scanner. Still, you can work with it.


Right, now for the new stuff. Pattern number two for the quilt is...an ice cream cone! Here's the pattern I made (again, the scanner cut off the end, but you can figure it out):


Each pattern will be on the quilt twice (haven't done the second cupcake yet). So here are my two ice cream cones:


So far, so good! I'll keep you posted!

Monday, September 13, 2010

Truffle Pincushions


If it looks like chocolate, it has to be good. I just found this tutorial for pincushions that look like chocolates, and I'm drooling a little already. Mostly over the dark chocolate circular one, which looks like Godiva's delicious new molten lava cake truffle...

Granted, the traditional ones take up less space, are more efficient, etc...but hey, chocolate is all about indulgence, right?

Thursday, September 9, 2010

Chipboard Letter Sign

So I saw a couple of blogs doing the "EAT" sign, and I thought it looked great. And now the letters are finished, but...I dunno, I can't say I'm that happy with it. Maybe changing the paint color will help.

You will need:
-Chipboard letters for whatever word you want to use (I added an "s" for "EATS," though I can't remember why...)
-Paint (I used a different color for every letter, though I may repaint them all the same)
-Patterned scrapbook paper (a different one for each letter)
-Mod Podge
-Sponge brushes

Start off by flipping the letters onto the wrong side (like a mirror image) and trace them onto the back of the paper (that way, you won't draw on the pattern). Cut out the paper letters. I used papers with food-themed prints. Paint the sides of each chipboard letter a different color and let them dry. You'll want to paint a rim around the front, too, just in case the paper doesn't exactly fit.


Once the paint has dried, use the Mod Podge to attach the paper to the letters. Coat the letters completely in the Mod Podge so they will be shiny (and possibly weather-proof? Maybe?). Now, if you know me, you know that something always goes wrong for me when I'm crafting. In this case, the problem was the Mod Podge - it kept sticking to everything I set the letters on to dry! Paper towel? Big chunks of fibers stuck. Wax paper? The whole thing glued itself to the letters. Towel (by accident)? Well, you can guess. In the end, I guess the wax paper worked the best, but there's no getting around it - you'll have to spend some time picking off all the little pieces that stuck.

So the letters are finished now. The other blog suggested that you just hang them on the wall with nails, but I don't like that. I found some patterned ribbon and a metal pole to string them on, which will hopefully look good. But I've got to say, the letters look really dark. All of the colors seem to blend together in the middle...so here's what they look like, but I'm thinking of redoing some or all of them.


Any suggestions?

Thursday, September 2, 2010


This isn't actually a craft project, but I saw this on an article and loved it. You can buy these at this etsy store, but I'd much rather make one. I love all things Halloween and it's nice to see a decoration that isn't a garish orange. They used pages of Poe, which works well with the Halloween theme. You can by fake pumpkins at any craft store, pick a book, get some Mod Podge and away you go!